User Guide: Creating & Managing Group Flags
This guide will walk you through the process of creating and managing Group Flags in the UI.
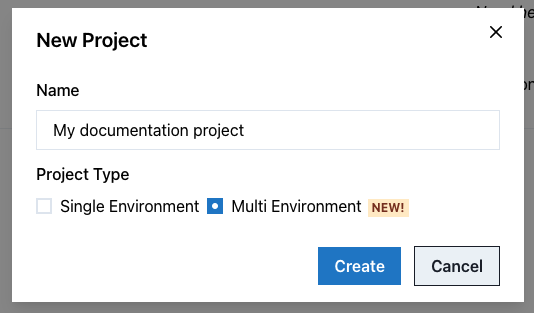
1. Create a new Multi-Environment Project
On the project’s page, create a new multi-environment project, by clicking the New Project button and then choosing the Multi Environment radio button.
2. Create some Environment Labels
Before you can create a Group Flag, you must define at least one “environment label” for your project. On the You can manage these in your project by clicking on the “Environment Label” button.
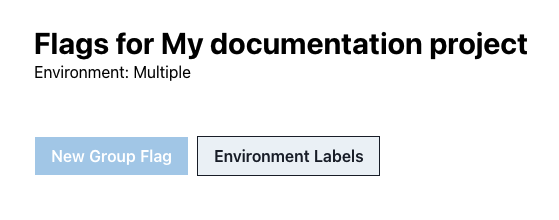
- Navigate to the Multi-Environment Project
- Click the “Environment Label” button.
- In the modal, click “Add Label” and enter the name of the environment labels and click “Save”.
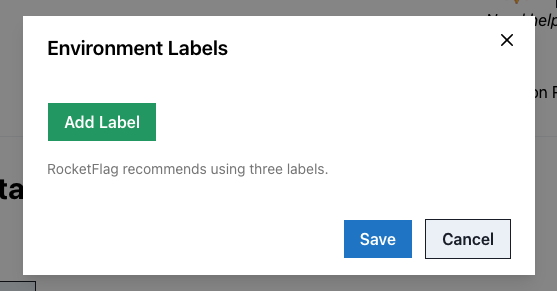
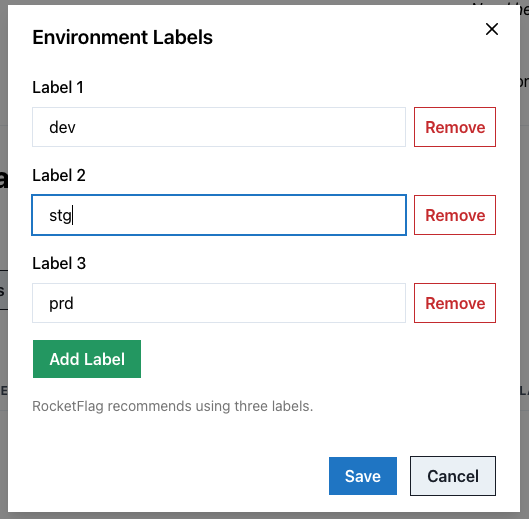
- You can keep clicking Add Label to add more labels for all your environments.
- The labels you’ve created will be displayed on the right.
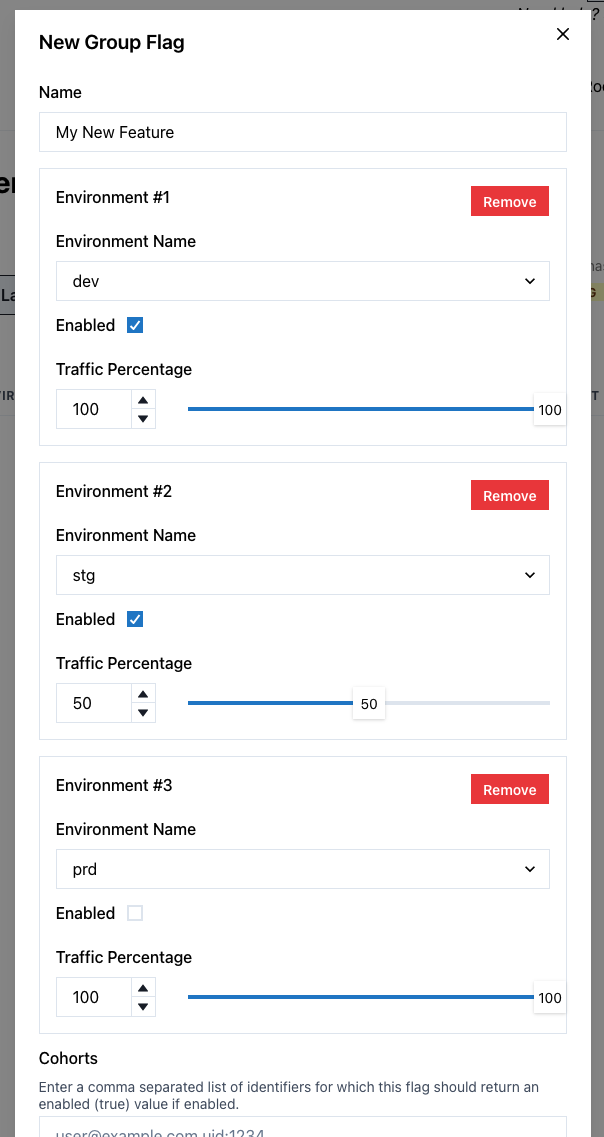
3. Creating a New Group Flag
- Click the New Group Flag button.
- Enter a descriptive Name for your flag.
- For each environment you want to add the flag to:
- Select the Environment Name from the dropdown.
- Toggle the Enabled checkbox to set the initial state of the flag in that environment.
- Adjust the Traffic Percentage to control the rollout of the flag.
- (Optional) Add Cohorts to target specific users or groups by entering a comma-separated list of identifiers.
- (Optional) Enable and configure a Protected Key for added security.
- Click Create to save your new Group Flag.
4. Assigning a Flag to One or More Environments
- When creating a new Group Flag, click the Add Environment button to add another environment.
- For existing flags, you can edit the flag to add or remove environments.
5. Managing the Flag’s State
- In the Group Flags table, find the flag you want to manage.
- In the Environments column, you will see a list of environments the flag is assigned to.
- Use the toggle switch next to each environment name to turn the flag “on” or “off” for that specific environment.
6. Editing the Flag’s Details
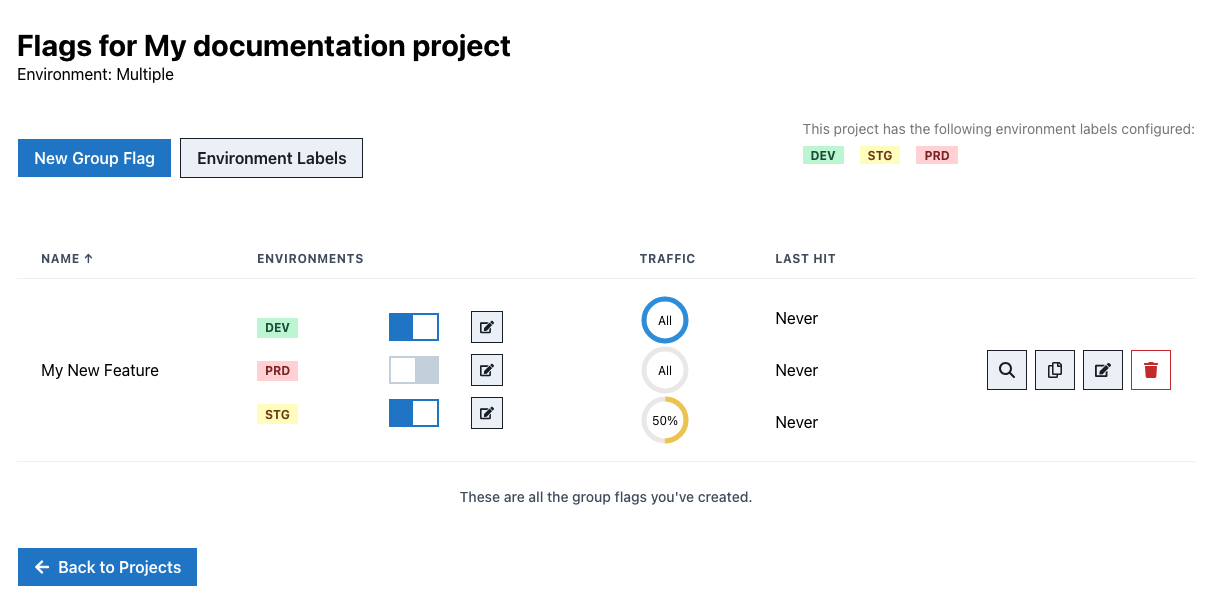
- In the Group Flags table, click the pencil icon next to the flag you want to edit.
- This will open the Update Group Flag modal, where you can change the flag’s name and description.
- To edit environment-specific settings (like traffic percentage), click the pencil icon next to the environment name in the main table.
7. Deleting a Group Flag
- In the Group Flags table, click the trash icon next to the flag you want to delete.
- A confirmation modal will appear. Click Delete to permanently remove the Group Flag.
API Guide: Using Group Flags in Your Application
This part of the guide explains how to use the API to fetch the status of a Group Flag in your application.
Fetching a Flag’s Value
To determine if a group flag is “on” or “off” for a specific environment, make a GET request to the following endpoint:
GET https://api.rocketflag.app/v1/flags/{flag_id}?env={environment_label}
Parameters:
flag_id(required): The ID of the Group Flag.env(required): The name of the environment.
Code Examples
cURL
curl "https://api.rocketflag.app/v1/flags/your_flag_id?env=production"
JavaScript (fetch)
fetch("https://api.rocketflag.app/v1/flags/your_flag_id?env=production")
  .then(response => response.json())
  .then(data => console.log(data))
  .catch(error => console.error("Error:", error));
Python (requests)
import requests

response = requests.get("https://api.rocketflag.app/v1/flags/your_flag_id?env=production")
print(response.json())
Example Responses
Flag is “on”
{
  "id": "your_flag_id",
  "name": "Enable New Dashboard",
  "enabled": true
}
Flag is “off”
{
  "id": "your_flag_id",
  "name": "Enable New Dashboard",
  "enabled": false
}
Flag not found
A 404 Not Found status code will be returned with an empty body.
Useful Tips & Best Practices
- Default State: When a new environment is added to a Group Flag, the flag is “off” by default, and the rollout it set to 100%.
- Error Handling: If you request a flag that doesn’t exist, the API will return a
404 Not Foundstatus code. Ensure your application handles this gracefully. - Protected Keys: Use Protected Keys when you need to prevent unauthorised users from guessing flag names and retrieving their values.
- Performance: The API is designed to be fast, but it’s always a good practice to cache flag values in your application for a short period to reduce the number of API calls. This can be particularly useful for high-traffic applications, and will improve the experience for your users.
- Security: Avoid storing sensitive or application-level information in flag names.